
Hola a todos!
Hello to everybody!
Recientemente he podido pintar una de esas miniaturas que siempre se guarda uno en el cajon pensando que un dia las pintará cuando este preparado. Se trata de un busto increible de Pegaso, de un kamikace Japonés de la Segunda Guerra Mundial:
Recently, I have painted one of those miniatures that are usually in a box wainting to be painted when you feel prepared. Is an increible bust from Pegaso models, a WWII Japanese kamikace:

Superar el excelente pintado de Ruina, es una tarea dificil casi imposible, asi que en todo momento lo utilice de modelo a seguir cuando tenia dudas de como avanzar. Espero que os guste el resultado:
Improve the excellent Ruina's version, is a very hard job almost imposible at least for me, so I used his version as a guide when I have problems (thanks so much!):
Historia / History
El término kamikaze (viento divino) de origen japonés, fue utilizado originalmente por los traductores estadounidenses para referirse a los ataques suicidas efectuados por pilotos de una unidad especial perteneciente a la Armada Imperial Japonesa contra embarcaciones de la flota de los Aliados a finales de la Segunda Guerra Mundial. Estos ataques pretendían detener el avance de los aliados en el océano Pacífico y evitar que llegasen a las costas japonesas. Con esta finalidad, aviones cargados con bombas de 250 kilogramos impactaban deliberadamente contra sus objetivos con el afán de hundirlos o averiarlos tan gravemente que no pudieran regresar a la batalla.
Aunque hubo diversas unidades suicidas en tierra, mar y aire, esta unidad especial de ataque es la más representativa de su tipo. Con 424 aviones llegaron a averiar y hundir hasta 100 barcos en total, lo cual es militarmente un éxito (no asi en vidas humanas).
Aqui teneis algunas fotos reales de ellos:
The Kamikaze term (holy wind) has a japonese origin, used by the usa translators when they talk about the suicide attacks done by the Japonese pilots against the allies fleet at the end of the second world war. Those attacks pretend to stop the allied ships advance in the Pacific Ocean and avoid they reach the japonese coast. To do this, using a plane carried with a 250 kg bomb, tried to hit the objetives to destroy or brake them.
Although it were a lot of suicide units on ground, sea and air, this special unit was the most representative of this type. With only 424 planes they hit more than 100 ships, so it was a great military success (not in human lifes).
Here you are some photos of them:


El busto de Pegaso Models es perfecto respecto a las fotos reales, y la expresion de la cara nos transporta al momento previo al impacto, una pasada:
So the Pegaso's bust is perfect in all details seeing the real photos, and the bust expression take us to the seconds before the hit, really impressive:


Pintado el cuerpo / Painting the body
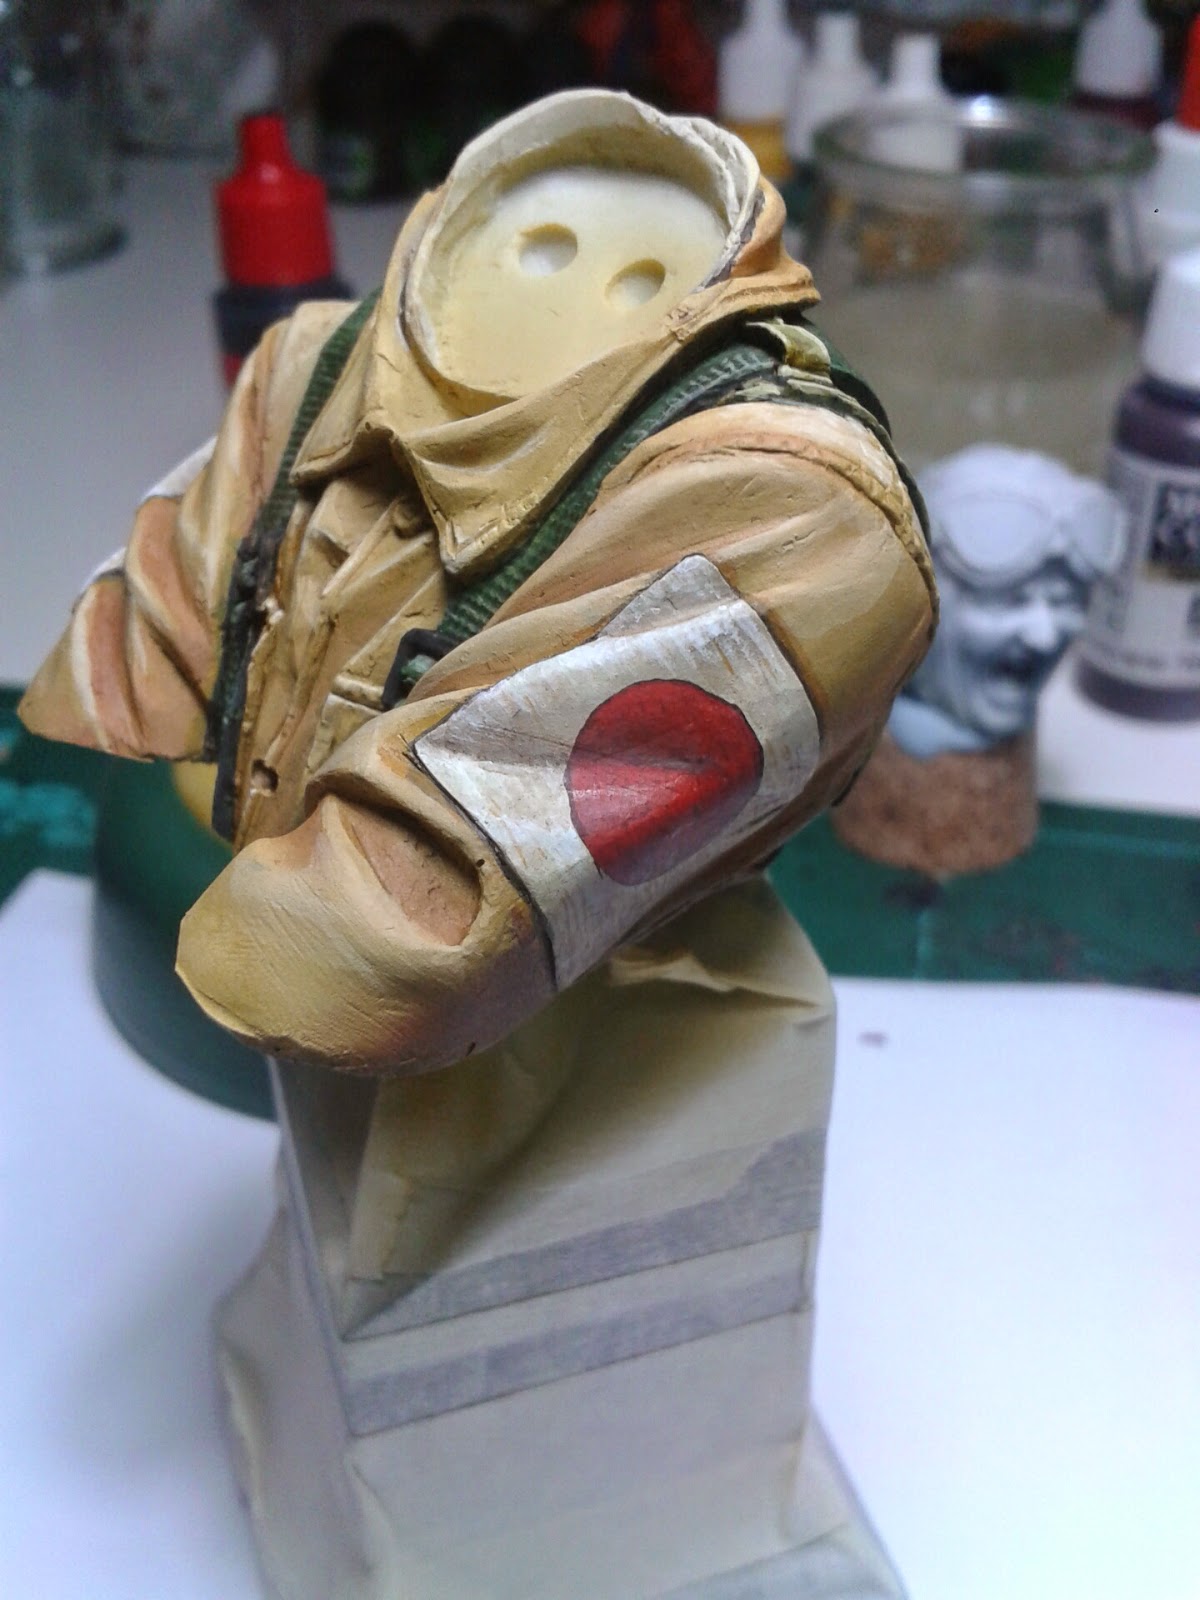
Dado que se trata de un busto histórico, es importante utilizar los colores correctos para el tipo de uniforme y los complementos del uniforme. Para ello es importante documentarse antes de empezar a dar color a la miniatura. Para ayudarnos, vallejo ya tiene muchos colores cuyo nombre ya nos indica a que ejercito y unidad pertenece, como por ejemplo el japanese uniform que hemos utilizado para la base de la chaqueta. Para las luces utilizaremos light brown de vallejo model air, skin tone de model air y white. Para las sombras utilizaremos armor brown de model air y black:
So it is a historic bust, so is very important to use the correct colors for the uniform and the other parts. So it's very important read some documentation before start painting. To help us, vallejo has a lot of colors with a "historic" name, as happens with the "japanese uniform" that we have used to paint the base layer of the body. For the lights we will use light brown from vallejo model air, skin tone from model air, and white. For the shadows we will use armor brown from model air, and black:


Despues de dar la capa base con aerografo, utilizamos los mismos colores para puntear toda la superficie. Es importante repetir toda la operacion varias veces utilizando diversos tonos, pero manteniendo en mente donde estan las luces y las sombras. Se puede utilizar una esponjita o un pincel de oleo para ir mas rapido. Yo he utilizado pincel. Al hacer un punteado, intentamos simular un tejido de tela gruesa. Sin embargo, en los parches de la bandera de japon, queremos simular un tejido de tela fina, por lo que aplicamos rayas en lineas paralelas en toda la superficie.
After painting the base layer using the airbrush, we use the same colors to point all the surface. It's very important to repeat the pointing some times using diferent tones, but having in mind where are the lights and the shadows. You can use a sponge or a brush for oils to do it faster. I have used a brush. This technique is used to simulate a rough cloth. Nevertheless, for the japanese flags in the arms, we make several parallel lines to simulate a thin cloth.


Para el chaleco de la parte de atras, utilice una mezcla de verde militar de vallejo, con beige de vallejo y rojo negro de vallejo para las sombras. Despues de realizar el trabajo de iluminacion y sombreado, perfilé cada rombo usando beige y blanco.
For the back vest, we use a mix of military green from vallejo, beige from vallejo, and black red from vallejo for the shadows. Also I use violet ink from GW for the shadows. After the light and shadows works, I outlined all the rhombus using beige and white.

Primeramente, aplicamos una capa base de carne base de vallejo. Aprovecho para pintar la boca de marron oscuro (marron rojizo con un poco de negro). La lengua simplemente con marron rojo y la lengua la resaltamos usando un poco de beige añadido al marron rojo. Ademas damos algo de barniz brillante al interior de la boca para que tenga mas realismo.
First of all, we apply a base layer using skin matt from vallejo. I also paint the mouth using reddish brown from vallejo and black. For the tongue I used red brown from vallejo and adding some beige for the lights. I also add some gloss varnish inside the mouth to give more realism.


Para pintar la cara, hemos seguido un proceso estandar. Para luces hemos utilizado carne dorada para subir las luces, y terminar añadiendo beige y finalmente algo de blanco para las luces finales. Para las sombras, hemos utilizado el numero 5 y 6, y para entonar las sombras algo de tinta violeta de gw. Para la barba, mezclamos el tono carne con marron chocolate de vallejo, aplicandolo en capas finas (aunque no veladuras). Es muy importante perfilar las arrugas de la cara para dar mas (aun) expresion a la cara:
For painting the face, we have follow a standard process. For the lights we have used golden skin from vallejo, adding more beige until reaching the white tones in the extreme lights. For the shadows we have used the skin Andrea set (number 5 and 6) and for giving some intonation we use some violet gw ink. For the beard, I mix the skin tone with some chocolate brown, applying it in thin layers. Is very important outline all the wrinkles to give more (even) expression to the face:


No hice fotos del proceso, pero si teneis cualquier pregunta sobre algun paso, no dudeis en preguntar.
I didn't made process photos, so any question will be welcome.
Fotos finales y reflexion / Final Photos and Balance


Lo Mejor/ The best
- La expresividad de la cara
- Facil montaje que permite pintar partes por separado y juntar sin problemas
- Diferentes texturas, tejidos y materiales.
- The face's expression
- Easy to mount so you can paint every part isolated and glue them after painting.
- Different textures, clothes and materials.
Lo Peor / The worst
- Algunos defectos de la resina son muy deficientes para una figura de este precio.
- Que se acabe tan rápido! es una mini muy chula. :'(
- Some cast defects are too big for such an expensive miniature.
- You will finish it too soon! I love this bust :'(
Espero que os guste y disculpar que no pueda poner más fotos!
I hope you like it and sorry for not have more photos of the process!
Bijou
No hay comentarios:
Publicar un comentario